TTL Setup: Denon: DP-300F Turntable / Kanto Speakers

Congratulations on your new TTL Setup! Here are detailed instructions on how to completely set up your Denon DP-300F turntable and Kanto speakers, plus some tweaks for optimizing the setup.
1.0 SET UP KANTO SPEAKERS
1.1
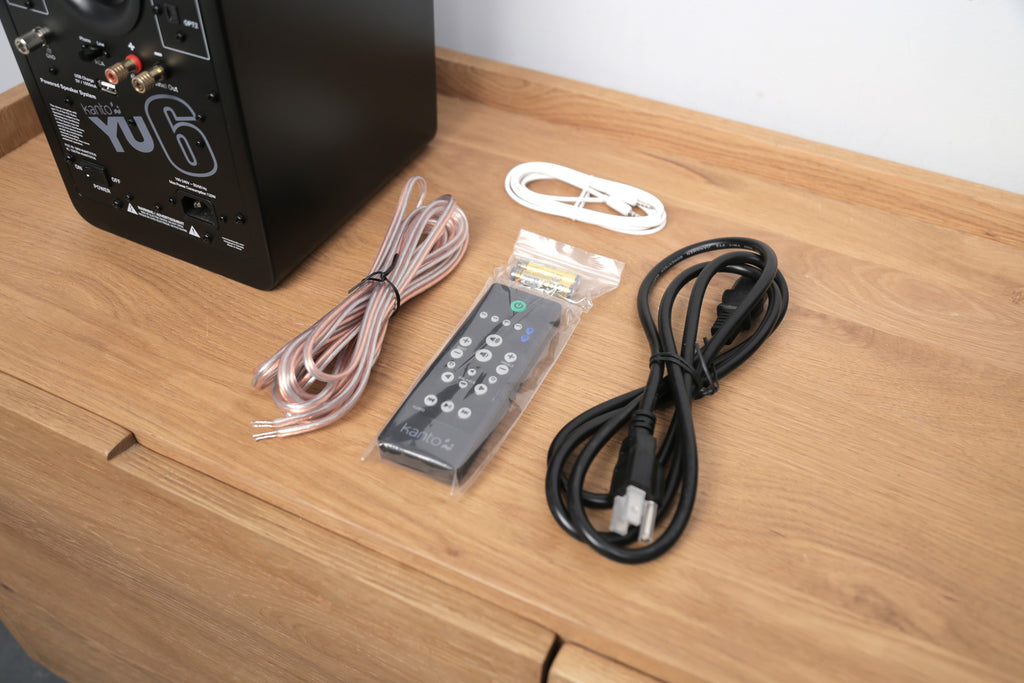
Unpack your Kanto speakers and locate the accessories and cables as shown. The clear speaker wire will be used to connect the (2) speakers together.

1.2
Position your speakers. NOTE: Position the powered unit on the left.

1.3
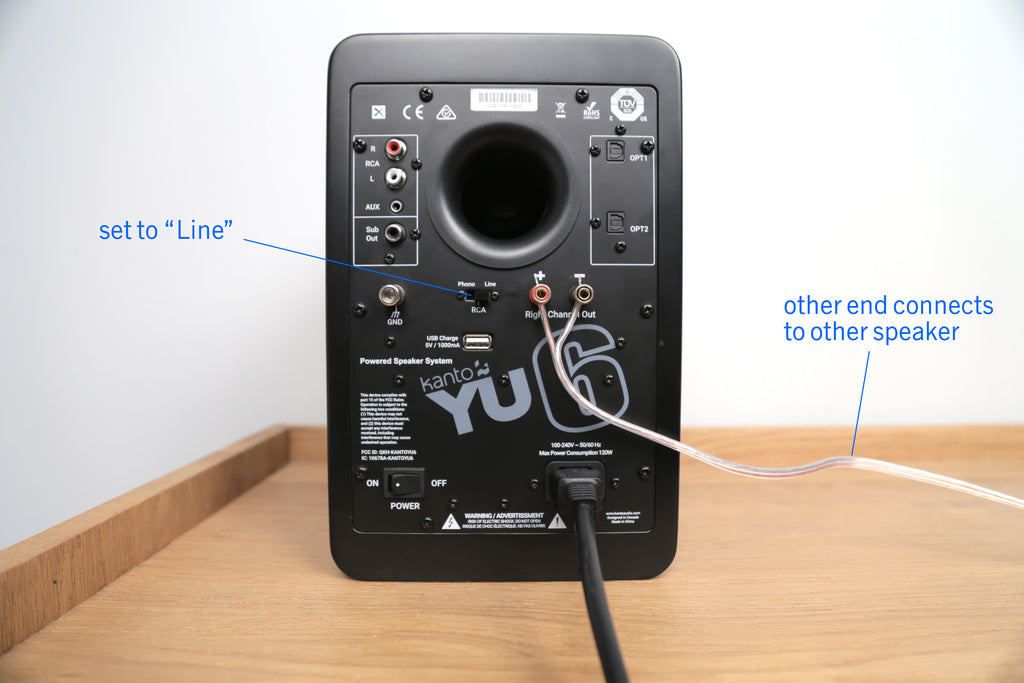
Plug in your speakers and connect them together using the speaker wire.
IMPORTANT: make sure the RCA switch is set to "LINE" (this deactivates the speakers' Phono Preamp, we'll use the turntable's preamp instead).

2.0 SET UP YOUR DENON DP-300F TURNTABLE
Please refer to this quick video to get your DP-300F turntable set up.
Now connect your turntable to the speaker using the RCA cable to the port shown below.

3.0 POWER UP + PLAY
- Turn on the power switch on the back of the speaker.
- Put on a record.
- Hit the start button on the turntable.
3.1
Press the volume knob to cycle through the inputs until hear your turntable (you can also press the "RCA" button on the remote). MUSICA!

4.0 UPGRADES (SOLD SEPARATELY)
Consider upgrading the Denon stock cartridge to the superior Ortofon 2M Red for greater clarity of sound. This is our most popular Hifi cartridge in the $100 price range and is the industry standard for audiophile listening.

4.1
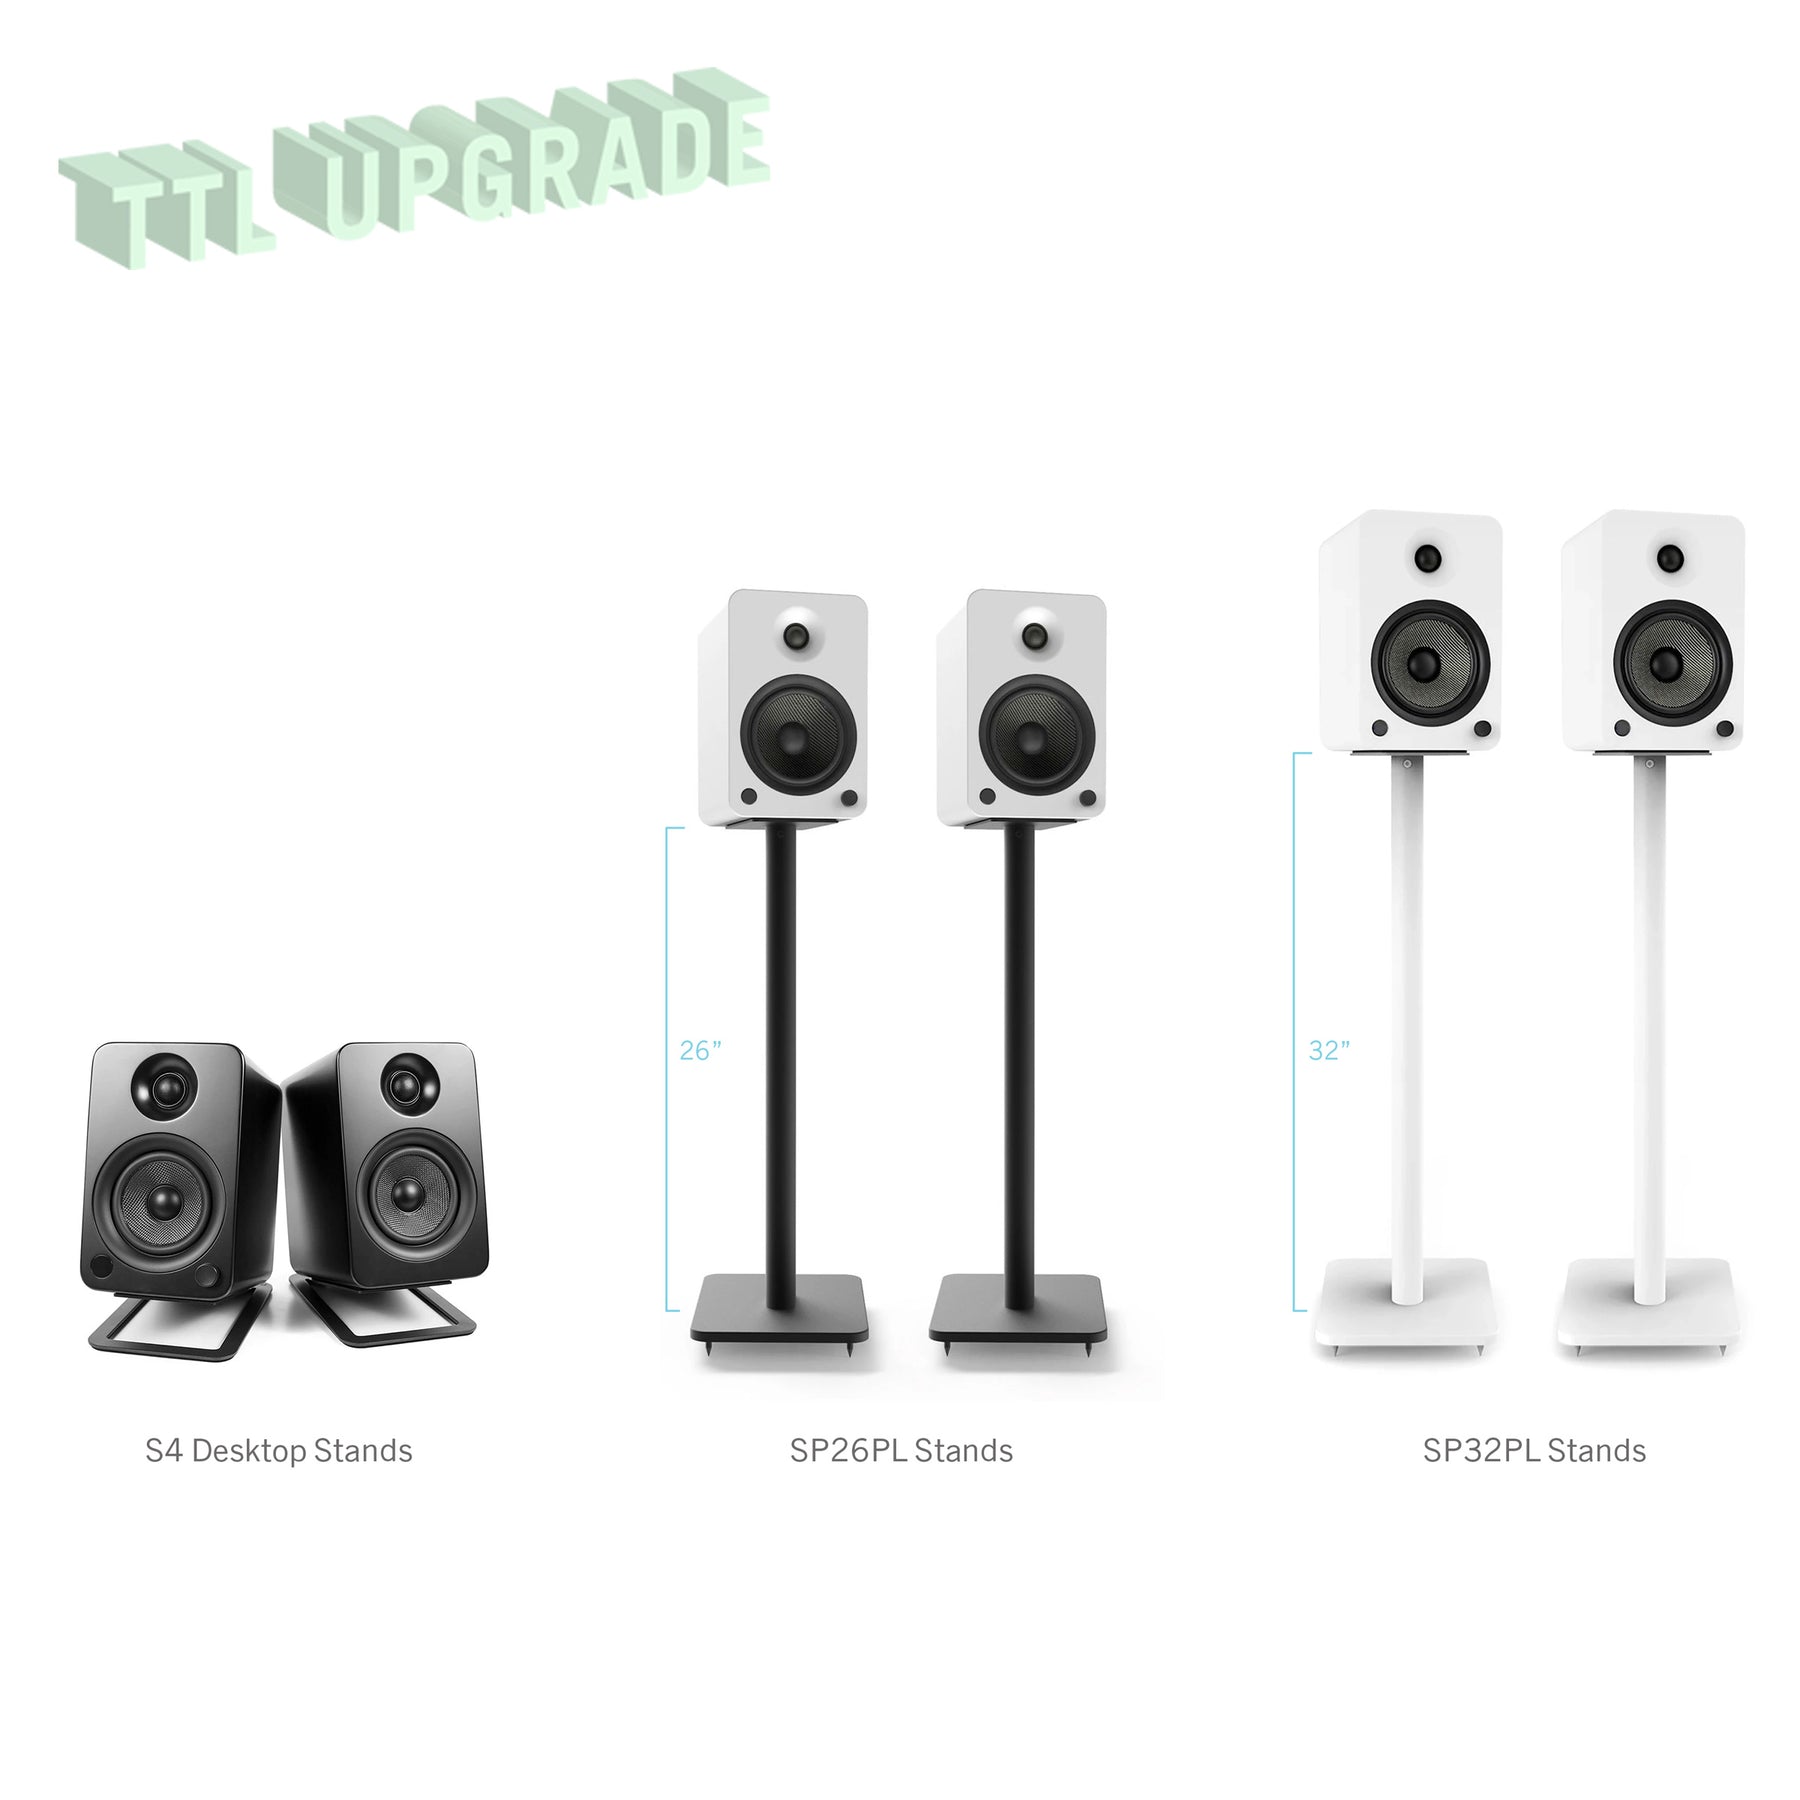
Kanto Speaker Stands displace speaker vibrations from your turntable and look great. They are available in table-top and floorstanding models.

- S4 Desktop Stands for YU4
- SP6 Desktops Stands for YU6
- SP26PL Speaker Stands for YU4 / YU6
- SP32PL Speaker Stands for YU4 / YU6
4.2
Turntable Lab: Triple Operation Brush ($25) - The Carbon Fiber brush that your setup is great for everyday usage (we use one in our office). However, our new Triple Operation brush is on another level in terms of effectiveness with dual cleaning pads plus an integrated carbon fiber brush.


