


Putting together a turntable setup is a simple process; however, there are several things you should know before purchasing your setup. This Guide To Turntable Setups will explain: the key components, the different setup configurations, and the most commonly asked questions. If you have further questions, don't hesitate to contact us.
↪ JUMP TO
- 1.0 Starters: What Is A Phono Preamp?
- 2.0 Turntable + Amplifier Setup
- 2.1 Minimalist Turntable + Powered Speaker Setup
- 2.2 Turntable + AUX Input Setup
- 2.3 Bluetooth Turntable + Bluetooth Speaker Setup
- 2.4 Turntable + Sonos Setup
- 3.0 Key Turntable Terminology For First Time Buyers
- 4.0 Cartridges Primer
- 5.0 Next Steps
1.0 What Is A Phono Preamp?

🔎A turntable produces a PHONO output signal. This phono signal needs to be converted to a LINE LEVEL signal (sometimes referred to as AUX signal) to work with audio equipment including stereo systems, computers, powered speakers, and Bluetooth speakers. A phono preamp converts PHONO to LINE LEVEL. Phono preamps can be built into audio gear such as turntables and amplifiers, or come as an external component.
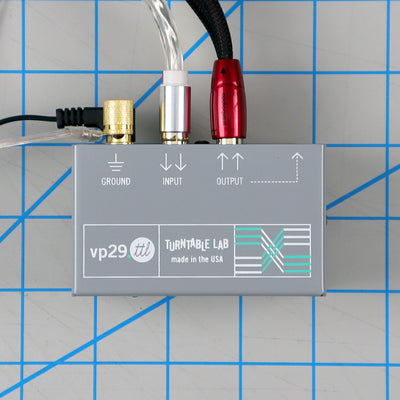
pictured: Bellari VP29.TTL Phono Preamp, an external preamp
Here are some things you should know about preamps:
- MOST new turntables have a preamp built-in, SO DON'T STRESS ABOUT THE PREAMP. Preamps are generally required for some vintage turntables and higher-priced, intermediate + high-end turntables.
- How can you tell if your turnable needs a preamp? See the guide in the next block⬇.
- Many OLDER audio systems / amplifiers and some new components have preamps built-in (look for inputs on the back of the unit marked PHONO).
- You only need (1) preamp in your system.
- If you do need an external preamp, identify the turntable's GROUND WIRE (a thin wire with U-shaped metal end connector). This needs to be connected for the preamp to work properly.
- If using an external preamp box (like the one pictured above), you will plug your turntable into the preamp box. You will need an additional set of cables (usually RCA cables) to connect to your audio system.
- Preamps have a wide range when it comes to build and sound quality. The cheapest preamps are around $50-$70, the most expensive can run well over $500.
- If you plug a PHONO signal into an AUX input, the music will be very quiet and there will be a loud hum.
How do I know if my turntable needs a phono preamp?

- If your turntable has this switch ①, your turntable DOES HAVE a preamp built-in. Set it to LINE to turn on the preamp.
- if your turntable does NOT have ①, ② AND ③ (it only has an RCA cable in the back), your turntable DOES HAVE a preamp (it has one built-in, and can't be turned off).
- If your turntable has a GROUND CONNECTION ② on the back, and NO switch ①, you NEED a preamp.
- If your turntable has this GROUND WIRE ③ coming out the back, and NO switch ①, you NEED a preamp.
- QUICK TIP: If a turntable has BLUETOOTH or a USB output, it DOES have a built-in preamp.
- QUICK TIP: Technics SL-1200s do not have a built-in preamp.
How do I know if my audio component has a preamp?

- Look for both: 1) an input marked 'PHONO' and 2) a grounding post to connect your turntable's ground wire (usually marked 'GROUND' or 'GND' or a pitchfork icon)
2.0 Turntable + Amplifier Setup

WHAT YOU'LL NEED
LAB POINTS
- This is the traditional turntable setup that uses an amplifer to power passive speakers.
- In our opinion, this type of setup will sound the best with vinyl. The combination of vinyl and a 2-channel passive system produces a warm, nuanced, stereo sound.
- If you already have an audio system like this one, it's easy to add a turntable - just figure out whether you need a preamp or not.
- Amplifiers that are labelled "integrated amplifiers" usually include a preamp.
EXAMPLE of AMPLIFIER SETUP (turntable not pictured)
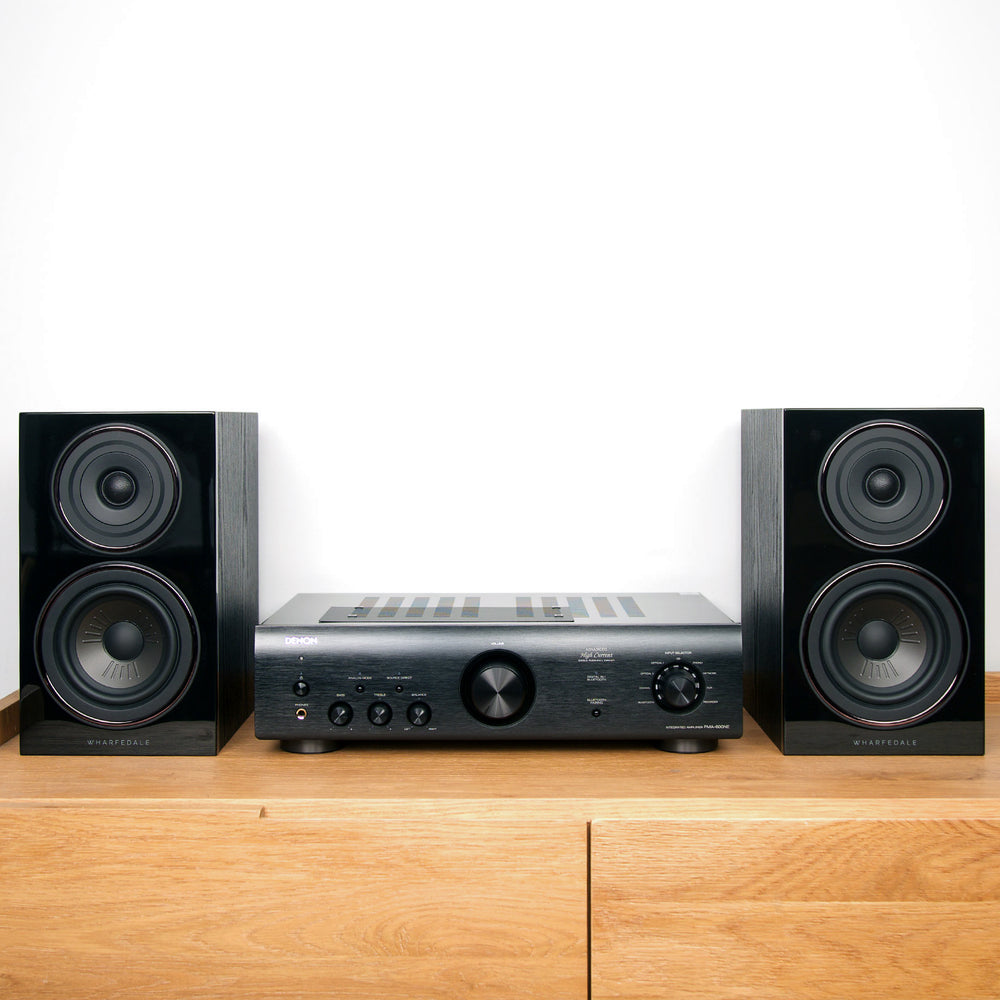
- This setup is ready to connect to any turntable. The Denon PMA-600NE Integrated Amplifier has both PHONO and AUX inputs to connect any turntable. It also includes an 'Analog Mode' setting which bypasses all the digital components for a true analog chain when listening to vinyl. The Wharfedale Diamond Speakers are passive and will produce a well-balanced sound.
2.1 Minimalist Turntable With Powered Speakers Setup

WHAT YOU'LL NEED
LAB POINTS
- This is the most streamlined setup. The turntable connects DIRECTLY to powered speakers.
- Powered / active speakers do not require an amplifier or stereo system. An active speaker will always have a power cord.
- ✔️ Because of its price, simplicity and smaller footprint, this type of setup has become very popular.
- With (2) speakers, this setup is also optimized for vinyl's stereo playback.
EXAMPLE of TURNTABLE + POWERED SPEAKER SETUP
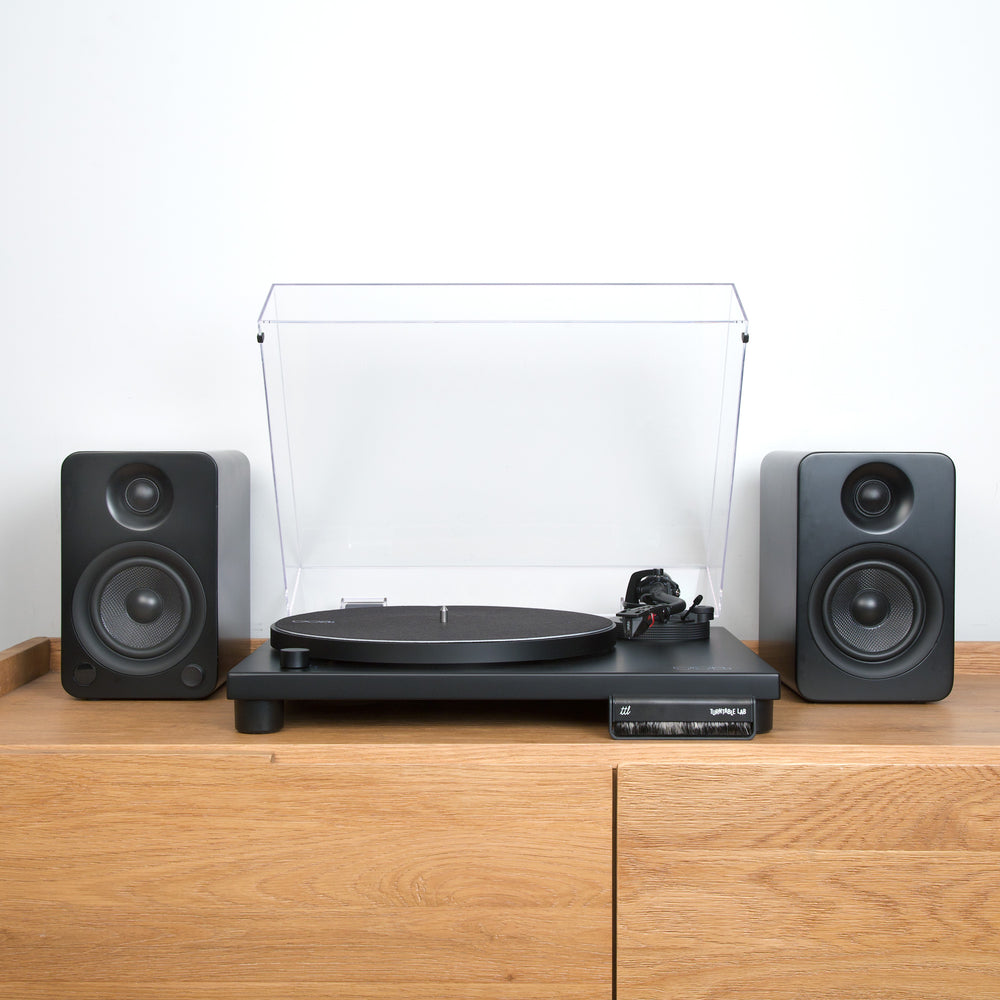
- This setup is simplified and easy to setup. The Music Hall MMF 1.5.ttl Turntable plugs directly into the Kanto YU4 Powered Speakers. When not listening to vinyl, you can also stream Bluetooth through the speakers.
2.2 Turntable + AUX Input Setup

WHAT YOU'LL NEED
- Turntable
- Any audio component with an AUX input
- You might need a Y-Cable adaptor
LAB POINTS
- You may want to use an audio speaker that you already own for your new turntable. Any turntable can be plugged into the AUX input of any audio system including computer speakers, home theater systems, Bluetooth speakers, laptops, etc.
- To plug into AUX, make sure your turntable is outputting a LINE signal (see preamp section above).
- There are generally (2) types of AUX inputs - RCA (the red+white double circles), or 3.5mm (headphone jack size). For 3.5mm inputs, you may need an adaptor, such as this one, to plug your turntable's RCA cables into.
2.3 Bluetooth Turntable Setup

WHAT YOU'LL NEED
- Bluetooth Turntable
- Bluetooth Receiver, Bluetooth Speaker(s) or Bluetooth Headphones
LAB POINTS
- Bluetooth-enabled turntables can pair directly with Bluetooth audio components.
- Bluetooth turntables will have a pairing button.
- Bluetooth turntables generally also feature a hardwired connection as well if you want to switch to a wired connection.
- Bluetooth connections may have some latency. For example, after you put the needle on the record, there will be a 0.5-2.0 second delay before you hear the output on the speaker.
- You can also connect Bluetooth turntables to Bluetooth headphones.
- Can you stream a non-Bluetooth turntable? YES, you can connect any turntable to the Pro-Ject Phono Box E BT or any similar Bluetooth transmitter.
EXAMPLE of BLUETOOTH TURNTABLE SETUP
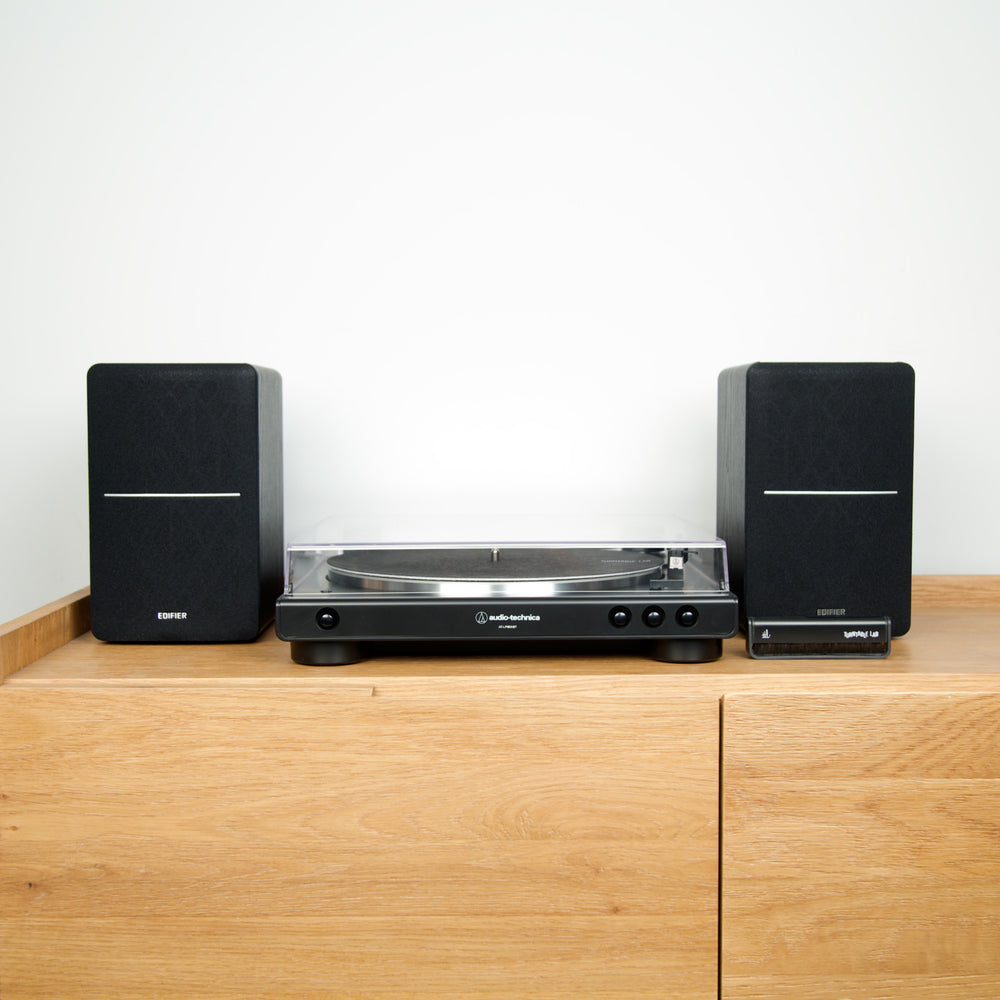
- This turntable setup features both an Audio-Technica Bluetooth turntable and Edifier Bluetooth speakers. The Bluetooth connection allows for flexible, non-wired placements. This is also an excellent entry-level package ($349).
2.4 Turntable + Sonos Setup

WHAT YOU'LL NEED
- Turntable
- RCA to 3.5mm adaptor (in most cases)
- at least (1) Sonos component that has an audio input:
- Five / Play:5
- Amp / Connect:Amp
- Port / Connect
- Era 100* / Era 300*
- Move 2*
- " * " = also requires Sonos Line-In Adaptor
LAB POINTS
- You can plug a turntable into certain Sonos components which will allow you to play your turntable through your entire Sonos system.
- You can control the input and sound with the Sonos app. From the music note icon tab, tap Line-In.
- You will experience some latency. For example, after you put the needle on the record, there will be a 0.5-2.0 second delay before you hear the output on the speaker. There are ways to minimize this through the app settings.
- Victrola Stream Turntables allow you to wirelessly connect to Sonos.
EXAMPLE of TURNTABLE + SONOS SETUP
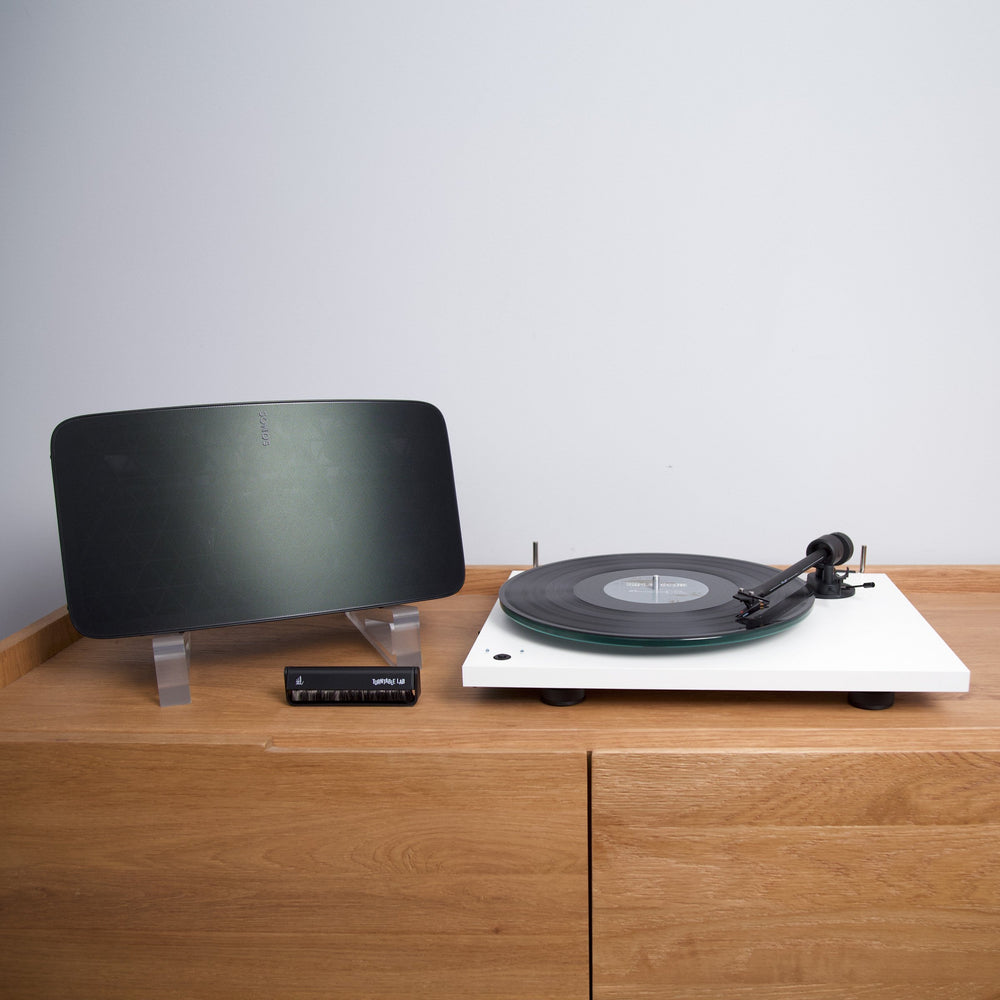
- This turntable setup features both a Pro-Ject T1 Phono SB turntable and Sonos Five speaker. Our package includes detailed instructions on setup and all necessary cables.
3.0 Key Turntable Terminology For First Time Buyers

Belt Drive vs. Direct Drive
- Belt drive turntables feature a motor pulley and a rubber belt, which turns the platter.
- In direct drive turntables, the motor is directly connected to the spindle. The spindle turns the platter.
- Some argue belt drives offer smoother operation because the motor (which tends to vibrate) isn't directly connected to the platter. We think this is debatable and are comfortable with both styles.
- Direct drive turntables are generally more sturdy and require less maintenance.
Manual vs. Automatic vs. Semi-Automatic
- MANUAL TURNTABLES are the most common. With manual turntables, the user switches on the motor and places the needle on the record. At the end of the record, the record keeps spinning and the needle remains safely on the record.
- AUTOMATIC TURNTABLES feature a button that both automatically places the needle on the record and starts the motor. They also feature a stop button that stops the record and returns the needle to the initial resting position.
- SEMI-AUTOMATIC TURNTABLES do not have buttons to control the tonearm. Generally, they stop the motor at end of the record and lift the tonearm (without returning). Some only stop the motor at the end of the record, others only lift the tonearm.
Additional Terms That Come Up Frequently
- 33 / 45 / 78: Records are meant to be played at one of (3) speeds. Most records are 33 1/3 RPM (revolutions per minute), while some are 45 RPM. Some vintage records are 78 RPM (pretty rare). Most turntables offer 33 / 45 playback.
- Anti-Skating Control: The inertia of a needle riding a record groove towards the center of the record naturally favors the inner-side of the groove. Anti-skating control corrects this and helps the needle ride the center of the groove. This is a nice feature to have, but not totally necessary for an entry-level turntable.
- Counterweight: The weight opposite of the cartridge on the tonearm. This is useful because it allows you to adjust the weight / force on the needle, allowing you to fine tune your cartridge settings. It also allows you to use cartridges with different weight settings.
- Dustcover Hinges: These allow your dustcover to flip open while still connected to the turntable. HingeLESS dustcovers must be removed completely and are not connected to the turntable.
- Headshell: Some turntables have this part that connects the cartridge to the tonearm. Removable headshells are preferred in most cases, because it makes changing your cartridge easier.
- Pitch Control: This is a control found on some turntables that let's you control the speed of the platter. Common pitch controls let you increase / decrease speed by +/- 8-10%. This control is mostly used for DJing.
- RCA: A type of cable most commonly used for turntable output. This red and white coded cable carries right and left channel signals.
- Record Mat / Slipmat: Commonly made of felt or rubber, this thin, record-shaped pad goes between your record and the platter. These protect your record from the platter. Felt mats also let you take off the record while the motor is still on.
4.0 Cartridges Primer
LAB POINTS
- Of the parts on a turntable, the cartridge is probably the most important when it comes to sound quality. As you go up in turntable price, the cartridge quality should go up.
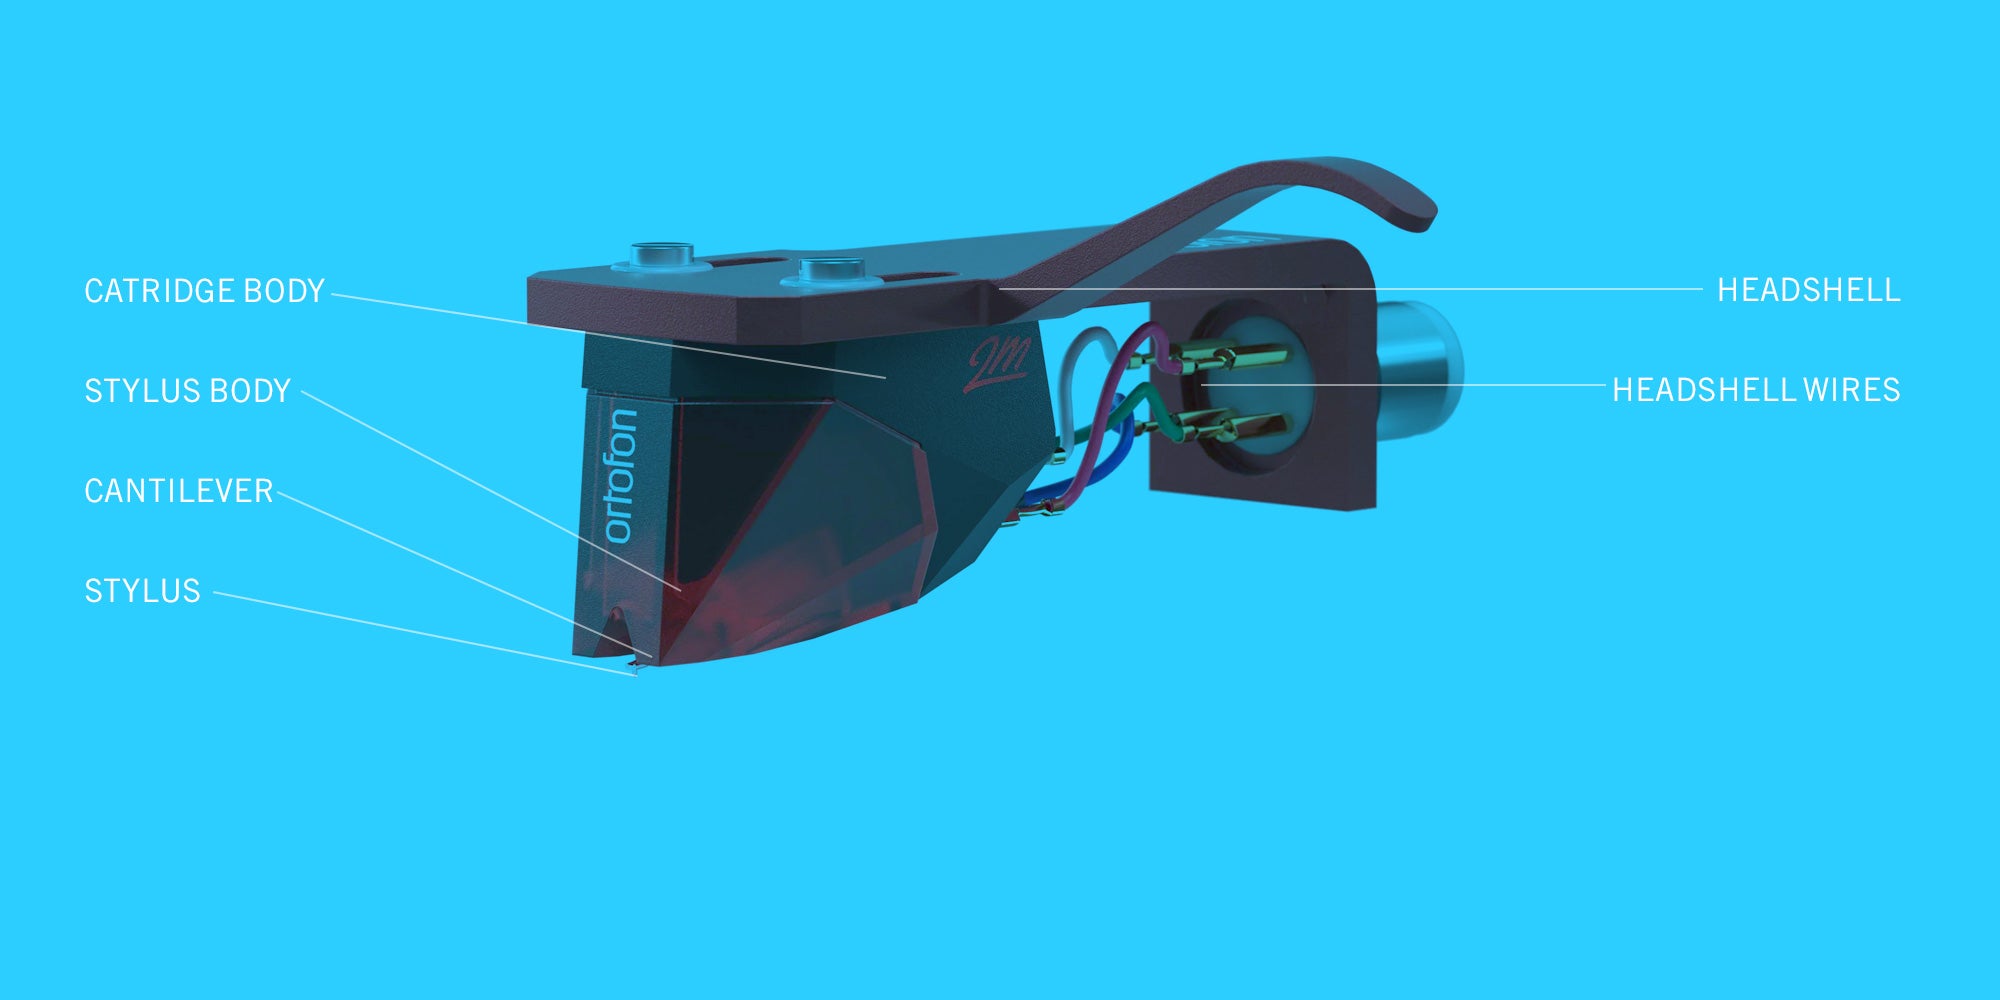
- STYLUS generally refers to the tip and small cantilever arm of a cartridge aka "the needle". The CARTRIDGE BODY refers to cartridge housing that connects to the turntable arm.
- MOVING MAGNET vs. MOVING COIL - You will see these terms often mentioned often. You can pretty much IGNORE 'moving coil', these are highly specialized, delicate cartridges for use with high-end turntables. Moving magnet is what you want, that's all you need to know.
- Diamond-tipped stylus, bonded stylus, elliptical diamond, nude elliptical - these are terms for a DIAMOND STYLUS. You want a diamond on the tip of your stylus. You want to avoid ceramic tips, which damages records.
- Cartridge UPGRADEABILITY should come into consideration when picking a turntable. Some cartridges can be easily upgraded by switching out the stylus only. Some cartridges can only be upgraded by swapping out the entire cartridge.
- Audio-Technica AT-LP60x Series turntables are unique in that the cartridge is built-into the turntable arm, and only the stylus (needle) can be changed.
MOST COMMON CARTRIDGES ON ENTRY TO MID-LEVEL TURNTABLES

- Audio-Technica AT-3600L / ATN3600L is the cartridge found on most entry-level turntables including Audio-Technica AT-LP60X Series.
- This cartridge is usually built into the tonearm and is not able to be changed.
- It's a basic, budget cartridge, but upgrades are available with the ATN91R or ATN3600LE, though they are not substantial upgrades.
- Replacement stylus
- upgrades: ATN91R / ATN3600LE

- Audio-Technica: AT-VM95E is found on entry-level / intermediate Audio-Technica models such as the AT-LP120x
- This is a step above basic and highly upgradeable. You can swap the stylus with any Audio-Technica VM Series stylus. We recommend the AT-VMN95EN.
- Replacement stylus
- Upgrade: AT-VMN95EN

- Ortofon OM5E is found on entry-level / intermediate turntables.
- This is a step above basic and highly upgradeable. You can swap the stylus with any OM Series stylus. We recommend the OM 20.
- Replacement stylus
- Upgrades: OM 10 / OM 20 / OM 30
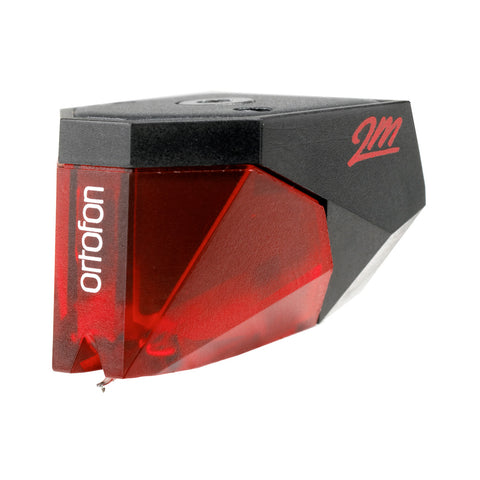
- Ortofon 2M Red is the gold standard for mid-level turntables.
- The 2M Series is highly upgradable. You can swap the stylus with any 2M Series stylus. We recommend the 2M Blue.
- Replacement stylus
- Upgrade: 2M Blue / 2M Bronze

- The Sumiko Rainier, part of the Oyster Series, is an entry point for higher-end cartridges. Each unit is hand-built in Japan. The Rainier comes stock on the Pro-Ject Debut Carbon EVO, as well as several other Pro-Ject models.
- The Oyster Series is highly upgradable. You can swap the stylus with most Oyster Series styli. We recommend the Moonstone.
- Replacement stylus
- Upgrade: Olympia / Moonstone / Wellfleet / Amethyst
5.0 Next Steps
- Shop our Turntable Packages
- Check out this list of our Favorite Turntables by Price
- Check out this list of our Favorite Powered Speakers by Price
- Check out this list of our Favorite Cartridges by Price
- Shop all Turntables
