


TTL Setup: Audio-Technica AT-LP70X / Kanto Speakers

Congratulations on your new TTL Setup! Here are detailed instructions on how to completely set up your Audio-Technica AT-LP70X turntable and Kanto speakers, plus some tweaks for optimizing the setup.
1.0 SET UP KANTO SPEAKERS
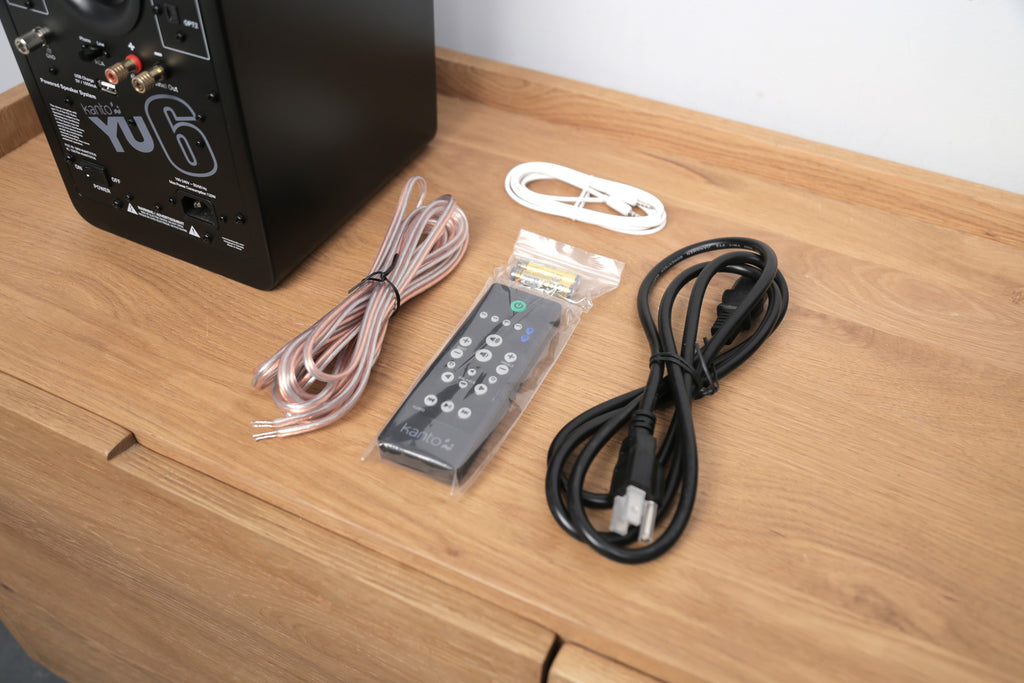
1.1
Unpack your Kanto speakers and locate the accessories and cables as shown. The clear speaker wire will be used to connect the (2) speakers together.
1.2
Position your speakers. NOTE: Position the powered unit on the left.

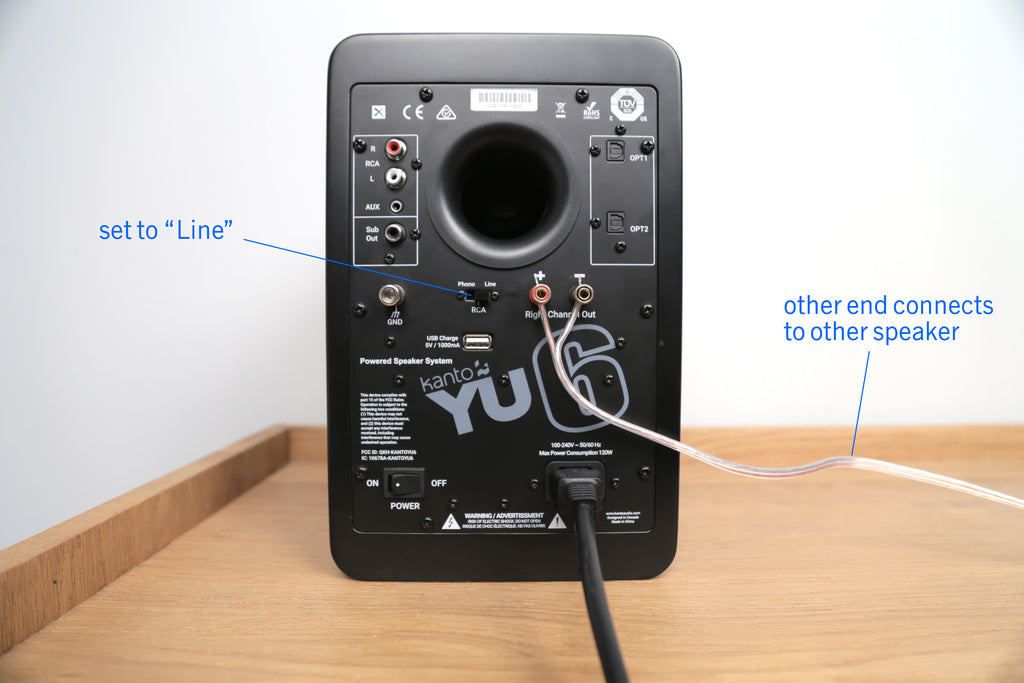
1.3
Plug in your speakers and connect them together using the speaker wire.
IMPORTANT: make sure the RCA switch is set to "LINE" (this deactivates the speakers' Phono Preamp, we'll use the turntable's preamp instead).
2.0 SET UP YOUR AT-LP70X TURNTABLE
Please refer to this quick video to get your AT-LP70X turntable set up.
3.0 CONNECT YOUR TURNTABLE TO THE SPEAKER
Now connect your turntable to the speaker using the RCA cable that comes with the turntable. Double check that both the turntable + speaker is set to LINE.
NOTE: You will not need the groundwire (wire with U-shaped connections that comes with your turntable) because we are using the turntable's built-in preamp. If you want to use an external preamp, you'll need to connect the groundwire.

3.1 POWER UP + PLAY

1) Turn on power switch on back of the speaker. 2) Put on a record. 3) Press the start button on the front of the turntable. 4) If you don't hear anything, press the LINE button on the remote or the INPUT button on your speaker (you may have to press the input button a couple times to cycle to the correct input).

4.1 +BLUETOOTH TURNTABLE OPTIONAL UPGRADE
If you purchased the Audio Technica LP60X-BT turntable with added Bluetooth functionality, you can connect your turntable to the Kanto speakers wirelessly. Ensure that you have followed step 1.3 above - connecting the two speakers. You can skip step 3.0 above and follow these connection instructions:
4.1.1
Activate the speaker's Bluetooth mode by pressing the Bluetooth button on the remote as shown below.

A flashing blue LED on the bottom left of the active speaker indicates that it is in pairing mode. When this light turns to a solid blue, that means that it has been successfully paired via Bluetooth.

4.1.2
Once the turnable is set up as above and connected to mains, push the Bluetooth button to the bottom left of the platter and hold for two seconds. The LED light will alternate flashing between blue and red, indicating that the turntable is in pairing mode. Once the turntable has successfully paired with the speaker, that flashing light will change to a solid blue solid blue. (NOTE: the turntable and speaker need to be within 3 feet of each other to pair).

4.1.3
Put on a record and start spinning! If you have any problems with pairing devices, feel free to reach out to our customer service team for troubleshooting tips.
5.0 UPGRADES
For a quick and easy to install upgrade, we recommend AT-VMN95EN stylus. This stylus features a nude elliptical stylus which is a big sound upgrade over the stock model (bonded diamond tip stylus). It's easy to install, just slide off the blue stylus and slide on the new stylus.

